
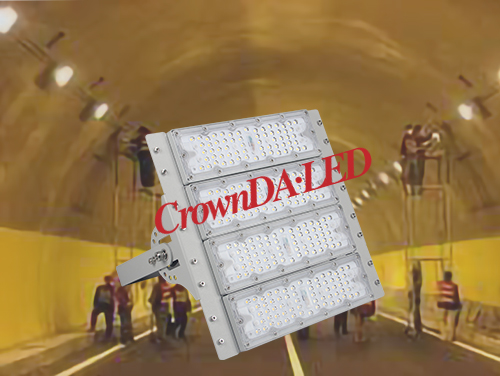
Tunnel light installation steps (2/2)
4. Main line cable layout: The main line cables are placed in cable trenches and bridges.
(1) Put the cable into the cable trench, place the cable horizontally on the support, and generally lay long-distance power cables or thick cables on the lower layer. The cable, and finally the power cord of the LED Unicorn Tunnel Light. There are short-distance cables or thin power cords at the top. When laying, it is forbidden to cross stack the cables, leaving a certain margin to avoid reducing the tension received by the cables. The cable must be connected to each cable groove bracket and fixed, and proper margin must be reserved when the cable enters and leaves the control distribution box.
(2) Laying the bridge: Place the cable horizontally on the bridge. Generally, place the long-distance cable outwards and use the short-distance cable for internal testing. The cables are bundled and fixed at an interval of 1 m-1.5 m. The cables should be left inside and outside the control distribution box with sufficient space.
5. Linear cable laying: Standard LED tunnel lights branch cables are usually laid on the bridge, and the lighting connection is divided into pre-branch cable connection, puncture clamp connection, and general dry pack connection as general connection methods. The LED Tunnel Fixture wiring is usually connected along the A, B, C three-phase live line to ensure the balance of the three-phase current. In the branch cable connection, the insulation of the interface and the branch cable head must be handled. Prevent iron short circuit. The branch cable has enough margin in the bridge and the access control distribution box. Evacuation indicator branch lines are usually laid in cable trenches or pipelines and connected with efficient tunnel lighting. The connection method is divided into pre-branch cable connection, puncture clamp connection and ordinary dry bag connection. The lamp wiring is usually connected along the A, B, C three-phase live line to ensure the balance of the three-phase current. Maintain proper margin when laying cables. When laying the pipeline, you must check the buried pipeline in advance, and tighten it if there is no problem.
6. Grounding cable laying: The grounding wire of the cable trench is usually grounded by flat steel, and the cross-section of the grounding wire is 40x4 galvanized flat steel or 16 round steel diameter, excluding other requirements. A certain distance between the ground wire and the ground electrode. The joints need to be welded or gas welded. The welded joints are treated with corrosion protection. The grounding distance is determined by design, and should usually be 5 meters. Or copper core cable. And at a certain distance, it is connected to the ground wire of the cable trench or connected to the ground electrode through the built-in tube.
7, cable nameplate: to facilitate wiring and future maintenance, each cable must have a nameplate indicating the cable loop number, starting point, and end-phase cable type. There must be a signboard at both ends of the bus circuit, and a nameplate on each cable shaft, corner and cable branch in the path. The other route should have a nameplate every 5-10 meters.
According to the control distribution box
The control distribution box in the tunnel is usually hidden.
1. Precheck: Check and measure all the reserved holes in the control distribution box. In the case of small holes or problematic small holes, they must be dealt with in time to check the pre-assembled pipe leading to the distribution box. If the diameter of the buried pipe is small or the pipe is different, it needs to be treated.
2. Installation of control distribution box: install and modify the control distribution box according to the number of the distribution box in the drawing. Before installation, please check whether the electrical components of the distribution box are damaged. When wiring, wiring inside the entire box is necessary.
3. Debugging: debug after installing the system. If the debugging is correct, the installation interval of the control distribution box is waterproof.
If the ground wire is made of flat steel when laying the bridge, flat steel (anti-corrosion treatment of flat steel) should be used before laying the cable, and then laid after connecting the cable. The flat steel connection can be fixed with copper screws or butt welds (the welded joints must be anti-corrosion treatment).